From sweltering summers to frosty winters, the S2 Pro Portable Air Conditioner & Heater by Cybertake is your year-round climate control companion for every off-grid escape!
Weighing just 12kg, this compact unit is the smallest and lightest dual-function portable AC on the market, delivering 1500W cooling (5100 BTU) and 1800W auxiliary heating (6100 BTU) wherever you roam. Powered by a Panasonic inverter compressor and Cybertake's smart algorithms, it drops temperatures by 10°C within 5 minutes, while 60-second inverter auxiliary heating warms you up faster in cold conditions. In ECO+ cooling mode, run for 8 hours on just 1 kWh of energy, with ultra-low power consumption starting at 120W and maximum startup power of 550W -- no peaks or surges. Adjust the thermostat from 16°C to 28°C for cooling, or 16°C to 32°C for heating, in 1°C intervals. Setup takes just 5 minutes with no drilling or cords, while the active drain system eliminates condensation hassles and the dehumidification function reduces humidity for enhanced comfort. Lightweight, waterproof, and whisper-quiet -- it's rugged portability meets powerful performance!
The 
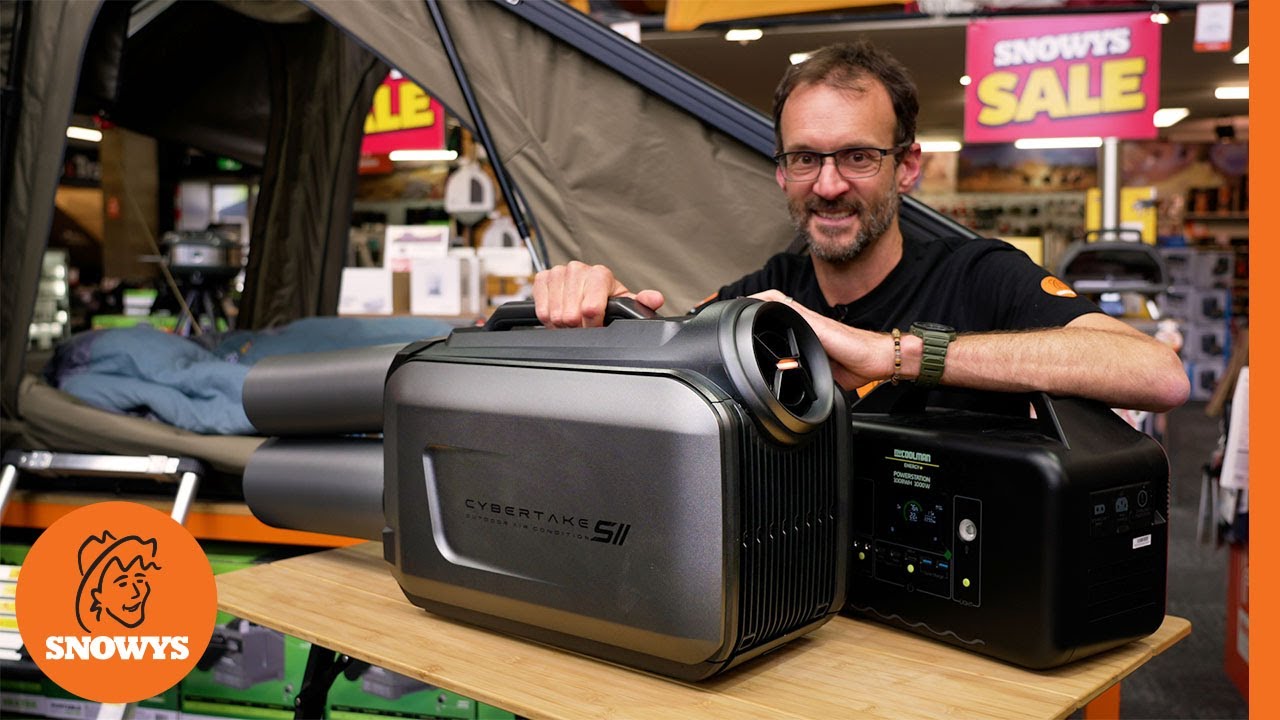
Cybertake S2 Pro Portable Air Conditioner & Heater
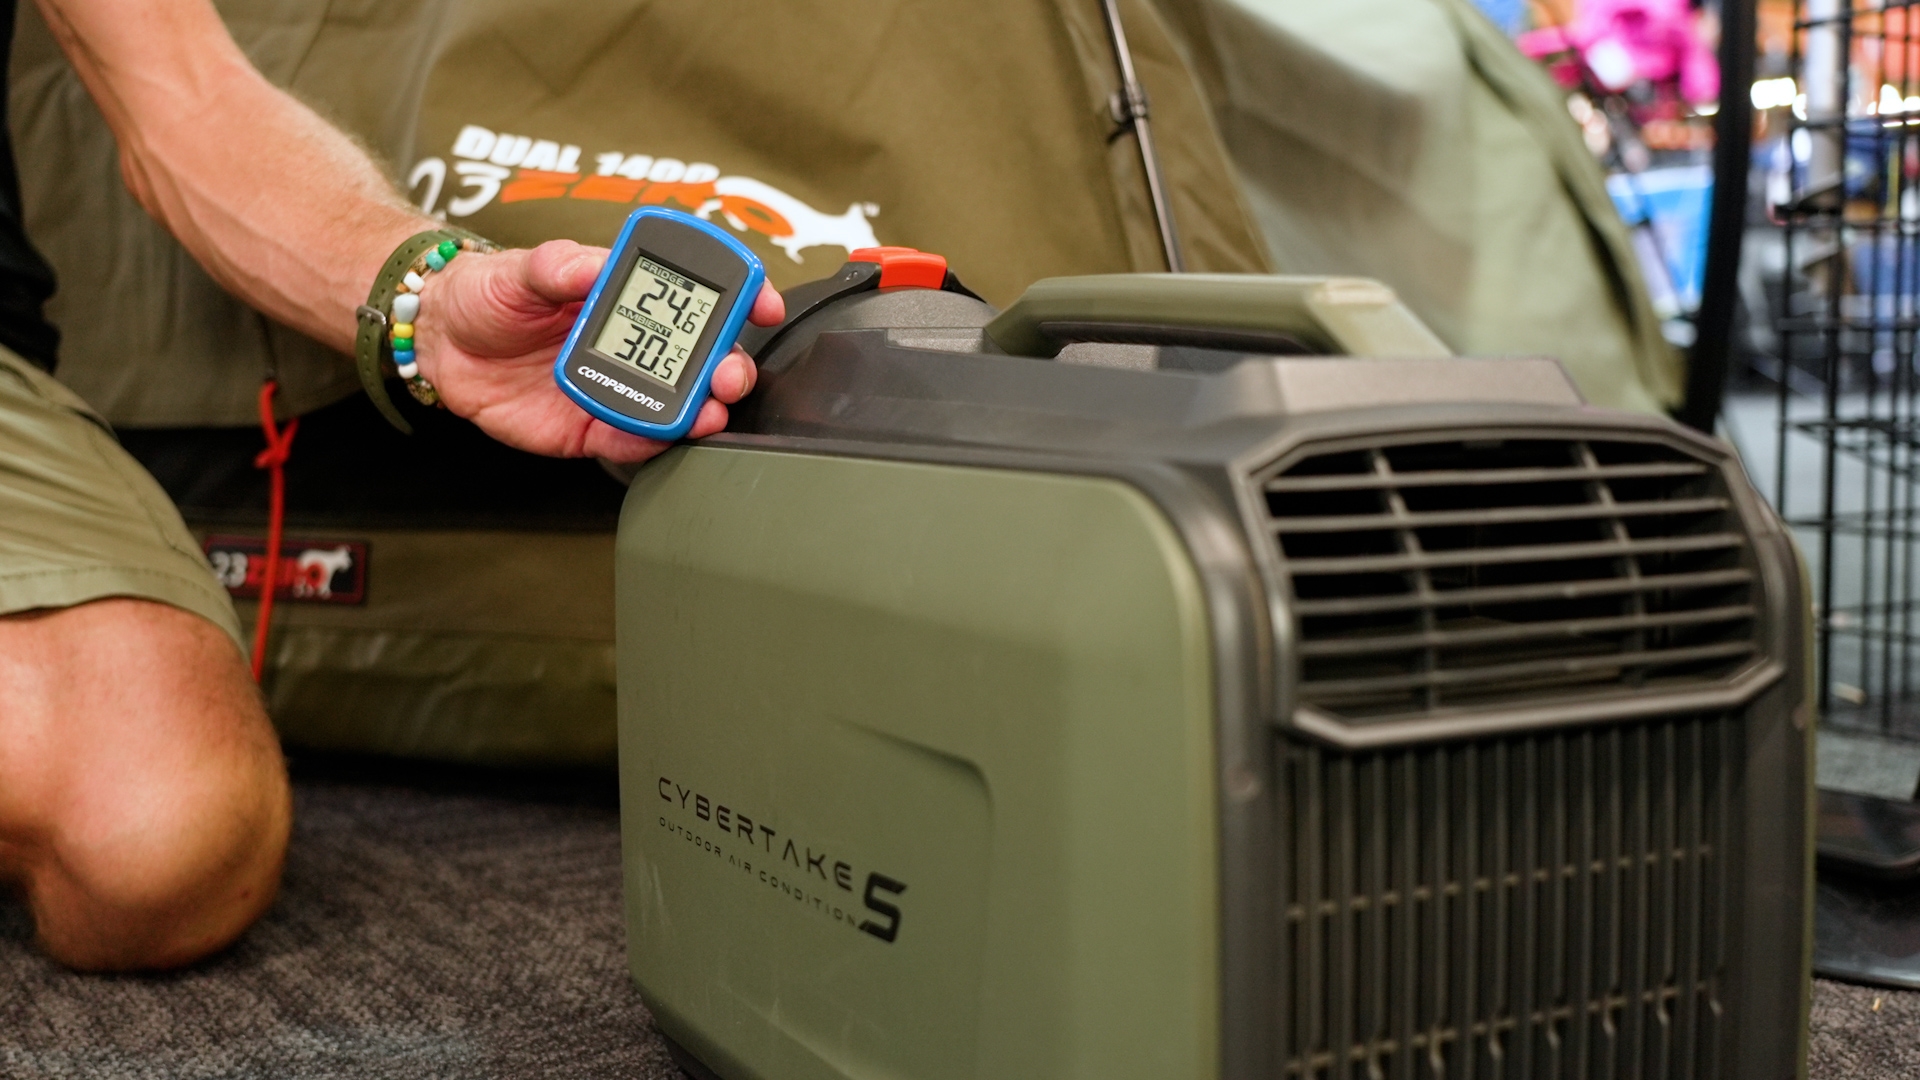
 is the all-season solution for ultimate off-grid comfort!
Hey guys, I purchased this today and have just read the manual. If you have a look at the manual you'll see pictures of the installation of front and rear hood and air ducts but no explanation of how to select the front or rear. Also there is no mention of installing the Hood Accessories A and B. There are two drainage outlets, but only one pipe and no explanation of which one to use.
G'day Bob,
Thanks for your feedback on the manual, thus has been passed on to Cybertake.
Regarding your queries, we have the following information:
Cool Setup Guide for Maximum Cooling Efficiency
To help you get the best cooling effect, here’s how to choose the duct installation based on your usage scenario:
â‘ If using the unit OUTSIDE (e.g., to cool a tent or car interior)
Use the two front ducts and route them into the enclosed space. This boosts air circulation in small, sealed areas to keep the air fresh. It also allows the A/C’s internal sensor to accurately detect the actual temperature inside the space, ensuring the cooling system adjusts optimally.
Pro tip: On mild days, you only need to connect the top front duct (the main cool-air outlet) – no need for both.
â‘¡If placing the unit INSIDE the tent or car
Connect the two rear ducts. One duct pulls in fresh outside air, and the other vents hot air out of the space. This forms a closed airflow loop, preventing stuffy, trapped heat and maintaining consistent, crisp cooling.
â‘¢If using in an OPEN space (e.g., a patio)
No ducts are needed. Simply power on the unit, and it will deliver direct cool air – setup is that easy.
Installation of the Hood & Air Ducts
Follow these 3 simple steps for correct installation:
1. Pull out the end of the air duct slightly to expose the connection part.
2. Screw the hood onto the end of the air duct until it’s secure.
3. Align the hood (with the duct attached) to the corresponding interface on the A/C, then twist it to lock it in place.
Explanation of the Two Drainage Outlets
The unit is designed with two drainage outlets to address potential uneven placement. If the A/C is placed on a slightly sloped surface, one outlet may be higher than the other. You can choose the lower outlet to connect the drainage pipe, ensuring condensed water drains smoothly without leakage. This design ensures flexibility in different placement environments.
Hope that helps!
Whether you're buying bulk for yourself, or through work, submit a quote request below and we'll work with our suppliers to offer our best price.